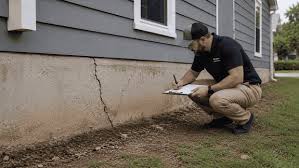
How to estimate concrete leveling costs: DIY calculator & guide
⏱️ 8 min read · Last updated: 2026
Before calling any contractor, running a concrete leveling cost calculator takes 20 minutes and changes every quote you receive. The framework rests on three variables — void volume, access difficulty, and material choice — and most residential projects land between $3 and $8 per square foot. My neighbor had no estimate when a mudjacking crew quoted $2,800 for a sinking patio slab; a foam contractor completed the same job for $1,400. A working concrete leveling cost calculator would have told him immediately which number was realistic. Use the steps below before scheduling a single site visit.
- Average mudjacking cost: $3–$6 per square foot in most residential markets as of 2026.
- Polyurethane foam leveling: $5–$10 per square foot — roughly 40–60% more than mudjacking for most slabs.
- Access difficulty pricing: surcharges of 15–30% are standard when equipment can’t reach the slab directly.
- Typical quote spread: expect a 35–50% price range between the cheapest and most expensive bid on the same slab.
- Void volume multiplier: the deeper the void, the more material required — voids over 4 inches can double your material costs.
What factors does a concrete leveling cost calculator use?
Three variables dominate your concrete leveling cost: void volume, access difficulty, and material choice. Regional labor rates, season, and company overhead shift pricing by 10–15%. These three core inputs move it 50–200%.
Void volume
Void volume is the empty space beneath your slab, measured in cubic feet (length × width × average depth). A 100-square-foot slab with a 2-inch void needs roughly 17 cubic feet of material; the same slab with a 4-inch void needs 34 — nearly double the cost. Probe four to six points with a screwdriver to find your average depth. For more on this measurement, see void volume filling.
Access difficulty
Contractors price access based on equipment travel distance and manual setup requirements. Direct truck access means the base rate. A fenced backyard or narrow gate typically adds a 15–30% surcharge to your concrete leveling cost. Interior slabs or rooftop decks can trigger 30–50% surcharges or project refusal.
Material choice
Mudjacking uses cement-based slurry — cheaper and effective for most residential slabs. Polyurethane foam uses expanding resin through smaller holes — more precise but 40–60% more expensive. Your concrete leveling cost calculator must specify which material you’re comparing before the numbers mean anything. For a full breakdown, see polyurethane concrete leveling cost.
How do I use a concrete leveling cost calculator step by step?
With void volume, access difficulty, and material choice defined, you have everything needed to build a working estimate. Grab a tape measure and a screwdriver — the whole process takes 20 minutes.
1. Measure the slab. Multiply length by width for square footage. Break irregular shapes into rectangles and add them.
2. Probe void depth. Push a screwdriver through cracks or along the edge at four to six points. Average the readings. Most residential slabs average 1.5–3 inches.
3. Calculate void volume. Multiply square footage by average void depth in feet. Example: 150 sq ft × (2 ÷ 12) = 25 cubic feet.
4. Apply the material rate. Mudjacking slurry costs $4–$8 per cubic foot; polyurethane foam runs $10–$18. Multiply void volume by the rate.
5. Add access difficulty. No obstacles: add nothing. One gate and a short walk: add 10%. Multiple gates or stairs: add 20–30%.
6. Add base overhead. Most companies charge a $400–$600 minimum for residential work in 2026. Add this to your material cost for the total.
For pricing context across slab types and regions, review concrete leveling cost statistics and this mudjacking cost breakdown.
How do I know if a leveling quote is fair?
Once your concrete leveling cost calculator gives you a working number, use it as the baseline for every bid you collect. A quote is fair when it falls within 15% of your estimate and itemizes material, labor, and access separately. Run each bid through this checklist:
- Does the quote break out material volume? If they won’t disclose how much material they’re pumping, you cannot verify the cost.
- Is access difficulty priced as a separate line item? A fair quote shows the surcharge explicitly.
- Does the per-square-foot rate match market averages? Mudjacking: $3–$6/sq ft. Foam: $5–$10/sq ft. Ask why any quote exceeds these by 20%+.
- Does the quote specify hole size and patching? Mudjacking requires 1–2 inch holes every 2–3 feet; foam requires 5/8-inch holes every 6–8 feet. Both methods should include patch work in the price.
- Is there a warranty? Quality concrete leveling contractors offer 2–5 year warranties — ask what conditions void it before signing.
Expect a 35–50% spread between your lowest and highest bid. A spread over 50% signals access complexity or an overcharge — your concrete leveling cost calculator estimate tells you which. The strongest fair-quote signal: the contractor probes void depth with you and explains the material volume before naming a price. For larger projects, see commercial concrete leveling cost.
Mudjacking vs. foam: which is more cost-effective?
The right material choice feeds directly into your concrete leveling cost calculator output — pick the wrong method and your estimate will be off by 40–60%. Mudjacking wins for thick slabs (4+ inches), direct access, and budget projects. Foam wins for thin slabs, tight access, interior work, or when a 15-minute cure time matters.
| Criteria | Mudjacking (slurry) | Polyurethane foam | Better for… |
|---|---|---|---|
| Cost per square foot | $3–$6 | $5–$10 | Budget → mudjacking |
| Cure time | 24–72 hours | 15–30 minutes | Speed → foam |
| Hole size | 1–2 inches | 5/8 inch | Cosmetic → foam |
| Slab thickness | 4+ inches ideal | Any thickness | Thin slabs → foam |
| Access equipment | Heavier rig | Smaller rig | Tight access → foam |
| Longevity | 5–10 years | 8–15 years | Long-term → foam |
| Minimum job charge | $400–$600 | $500–$800 | Small slabs → mudjacking |
Review mudjacking cost for regional pricing variations. Quick decision: if your slab exceeds 4 inches, has direct access, and hole size doesn’t matter, mudjacking saves 40–60% versus foam.
When is your concrete leveling cost estimate wrong?
Your concrete leveling cost calculator is accurate for most residential jobs, but a few site-specific conditions can throw off the numbers before you reach the quote stage. Knowing these in advance prevents surprises on job day.
Hidden utilities. Pipes or conduit beneath the slab may force adjusted injection points and slower pressure. Call 811 before any concrete work — it’s free and legally required.
Active soil movement. Ongoing erosion makes leveling a temporary fix. In that case, the repair scope shifts from leveling to soil stabilization — a different cost category your standard estimate won’t capture.
Structural cracking. Cracks wider than 1/4 inch need a structural assessment ($150–$300) before leveling. Your concrete leveling cost calculator measures void volume, not slab integrity.
Hidden access obstacles. A stone threshold or steep slope you missed can shift your access rating. Walk the full path with a tape measure before finalizing your estimate.
The bottom line
The concrete leveling cost calculator is a framework, not a magic number — but it’s the framework that separates homeowners who get fair quotes from those who get padded ones. When you walk into a contractor conversation knowing your void volume, access rating, and material estimate, the numbers on the table stop being arbitrary. Measure your slab, probe the void at four points, multiply, and add 25% for access. For full pricing context, review this mudjacking cost guide.
Grab a screwdriver and probe the void under your sunken slab this week. That single measurement changes everything about the quotes you’ll receive.
- Void volume and access difficulty are the two factors that shift your leveling cost the most — not zip code or square footage alone.
- Run your own concrete leveling cost calculator estimate in 20 minutes: measure the slab, probe the void, calculate material volume, and add an access surcharge.
- Your quote is fair when it breaks down material, labor, and access as separate line items — never accept a single lump sum.
- Expect a 35–50% spread between lowest and highest bids; use your self-estimate to identify which bids are realistic.
Common questions about concrete leveling cost estimates
What variables go into a concrete leveling estimate?
The four main variables are slab area, void volume, access difficulty, and material choice (slurry vs. foam). Regional labor rates and season also affect pricing by 10–15%.
How can I estimate my concrete leveling cost before getting quotes?
Measure your slab’s square footage, probe four to six points for average void depth, then multiply to get void volume. Multiply void volume by $4–$8/cubic foot for mudjacking or $10–$18 for foam. Add a 10–30% access surcharge and a $400–$600 minimum job fee.
How do I know if a leveling quote is fair?
A fair quote falls within 15% of your self-calculated estimate, breaks out material and access as separate line items, and matches market averages: $3–$6/sq ft for mudjacking, $5–$10 for foam. The strongest signal: the contractor walks the slab and explains material volume before pricing.
Why do leveling quotes vary so much for the same slab?
A 35–50% spread between quotes is normal — it reflects different material estimates, access assessments, whether patching is included, and company overhead. Use your self-estimate to identify which bids are realistic.
How accurate are online concrete leveling cost calculators in 2026?
Most online tools use only zip code and square footage, missing void volume and access difficulty — the two largest cost drivers. A DIY estimate using the steps in this article is more accurate because it accounts for site-specific conditions.
Ballpark estimate vs. on-site quote — which should I trust?
Always trust the on-site quote, but verify it against your self-estimate first. The on-site quote should be within 20% of your figure — if it’s 40%+ higher, ask the contractor to itemize the specific cost drivers.
How to estimate my leveling cost step by step?
Measure slab area in square feet. Probe four to six points for average void depth. Multiply area by void depth for void volume in cubic feet. Multiply by $4–$8 (mudjacking) or $10–$18 (foam) per cubic foot. Add 10–30% for access difficulty. Add $400–$600 minimum job charge. The total is your working estimate.
See also: concrete leveling cost statistics
See also: mudjacking cost
See also: polyurethane concrete leveling cost
See also: concrete leveling cost statistics
See also: mudjacking cost
See also: mudjacking vs replacement cost